Light Schedules For Autoflowering Cannabis Plants
Published :
Nov 8, 2019
Categories :
Cannabis cultivation

Autoflowers do not rely on a change in light cycle to start flowering. However, they still need a lot of light to grow great bud! Here is everything you need to know about autoflowering light schedules, types of indoor grow lights, and how to grow autoflowers outdoors under the sun!
Autoflowers are great: they keep things simple, grow fast, and don’t take up much space. This makes them ideal for beginners and an attractive option for experienced growers to boot. Below, we take a closer look at how to provide autoflowering cannabis with the best lighting conditions for a potent and heavy harvest.
PART 1: LIGHT SCHEDULES FOR AUTOFLOWERING CANNABIS
Unlike photoperiod plants, which rely on a change in light cycle to start flowering, autoflowers bloom based on age. However, just like photoperiod cannabis, autoflowers still use light to photosynthesise and produce buds.
Ever since the first stable autoflowering variety (Lowryder) arrived on the scene a couple decades ago, cultivators have debated whether a certain light cycle is better than the other to achieve optimal results. There are those who believe up to six hours of darkness will do. And then there are those who initiate completely novel light cycles, providing hours of light interrupted by short dark breaks.
Although it’s unlikely we’ll settle the debate on this matter, when it comes to achieving the biggest haul of the best-tasting and most-potent flowers, there are some factors you should consider about each autoflowering light schedule. If you’re curious, you can always experiment with these schedules for yourself.
A NOTE ON ENERGY OUTPUT
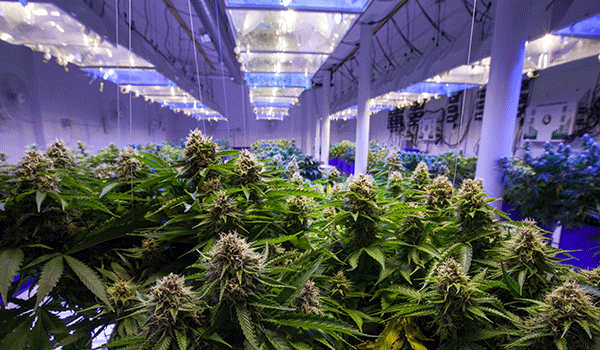
Better yields and bigger buds aren’t the only consideration auto growers take into account; there’s also energy output to reckon with. Growing your ladies under 18 hours of light per day will obviously use less energy than keeping them under 24 hours of constant light. This will affect both the cost and environmental footprint of your operation, so do keep this in mind.
Without further ado, here are some common light schedules that you can use to grow autoflowers.
 24-0 LIGHT SCHEDULE
A decent number of growers simply keep their plants under a constant 24 hours of light, day in and day out. This is obviously the easiest schedule to manage as it doesn’t even require a timer. Most cultivators choose this light cycle in hopes of parlaying this uninterrupted light exposure into better yields.
Although there is no definitive answer on whether this holds up, science does provide some backing to this theory. One way in which plants are categorised is by how they absorb and utilise CO₂. Some plants use C₄ carbon fixation; they gather CO₂ during the dark period to use for photosynthesising in the light period. But cannabis is a so-called C₃ plant that does not need a resting period; it continues photosynthesis as long as it receives light. Certainly a good argument for using a 24-0 schedule! Then again, there are growers who swear that some darkness is natural and crucial for cannabis plants, and are wary of subjecting their plants to such constant light exposure. Ultimately, the biggest con of the 24-0 light schedule is that it uses the most energy.
![]() Pros
Pros
• Easy, doesn’t require a timer
• May provide the best yields
![]() Cons
Cons
• Uses the most energy
 18-6 LIGHT SCHEDULE
The 18-6 schedule (18 hours of light followed by 6 hours of darkness) is the most common light schedule that growers of autoflowers use. The philosophy behind this isn’t rocket science; you provide your plants with enough light to encourage good yields, while also allowing your plants a brief but significant dark break to encourage healthy growth. And, of course, by using an 18-6 cycle instead of, say, 24-0, you can save up to 25% on your energy bill. It’s also worth noting that many auto growers who’ve experimented with both 24-0 and 18-6 light schedules note no significant difference in final yield.
Is there a drawback to using an 18-6 schedule? Well, this is not a biggy, but as with most other light schedules, you will need a timer.
![]() Pros
Pros
• Good yields
• Allows your plants to rest
• Uses less energy than 24-0
![]() Cons:
Cons:
• Requires timer
 20-4 LIGHT SCHEDULE
Then there is the middle-ground for those looking to extract the best qualities of the two aforementioned light cycles. By extending the lights-on phase for two hours, some growers believe they can squeeze out bigger yields while still allowing their plants some rest.
![]() Pros
Pros
• Good middle-ground between 18-6 and 24-0 schedule
• Some energy savings
![]() Cons:
Cons:
• Uses more energy than 18-6
• Requires timer
 6-2 LIGHT SCHEDULE
Perhaps the most uncommon light schedule used by auto growers is three daily sessions of six hours on, two hours off. Those who use a 6-2 schedule claim that it increases plant growth and can also make for a more stable and controlled environment.
The principle behind the 6-2 schedule is that cannabis plants can only process a certain amount of light per day. After that level has been reached, the plant no longer absorbs light, which means any additional light would be wasted.
The 6-2 light schedule breaks the cycle into three six-hour periods with short two-hour breaks in between where the plant can rest and process the light it has received. When the lights come on again, the plant will be ready to process it. As a result, the theory states that you can maximise the growth of your plant when lights are on. Proponents of the 6-2 light schedule also argue that a shorter light period inflicts less stress on plants and cooling systems, as the schedule allows the room to cool before the lights come back on. Opponents of 6-2, however, say that using more frequent but shorter light and dark cycles unnecessarily stresses components like lights and heating.
![]() Pros
Pros
• Potentially less stress on your plant
• Theory supports greater production potential
• Can make for a more stable environment (temperature, etc.)
![]() Cons
Cons
• Stresses equipment more
• Largely under-practiced
A NOTE ON TEMPERATURE
We already discussed how different light schedules can potentially alter the health and size of your harvest, as well as how it can affect your energy bill. But there is yet another consideration to take in: how your light schedule will affect the temperature in your grow room or tent.
When you run lights for many hours without a break, this increases the temperature in your grow room significantly. This can be a positive or a negative: If you’re growing in a hot environment, the heat produced can be an issue that forces you to enact additional cooling measures. In this case, a light schedule with dark breaks, such as a 18-6 schedule or a 6-2 schedule, won’t heat up your grow room as quickly. On the other hand, if you are growing in a cool environment, constant light exposure can help raise temps without the addition of another heating element. So keep this in mind as well when choosing a light schedule.
PART 2: TYPES OF GROW LIGHTS FOR YOUR AUTOFLOWERS
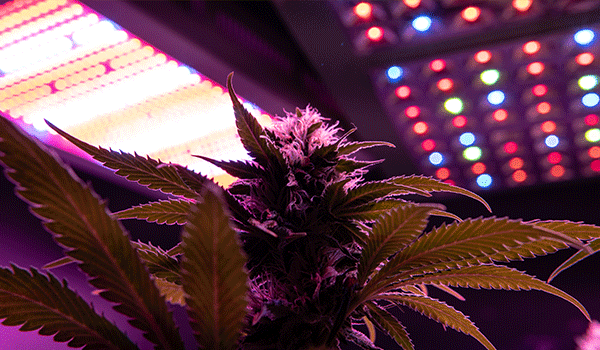
There are two main types of cannabis grow lights: HID (high-intensity discharge) and LED grow lights. Although HID lights are the old standard among indoor growers, and are still common today, in recent years LEDs have become more advanced yet affordable, offering home growers an option to rival HIDs. Here is what you need to know about these two types of grow lights.
HID GROW LIGHTS (MH, HPS)
HID lights are cheap, powerful, and they can grow some awesome weed. There are two types of HID light bulbs: metal halide (MH) and high-pressure sodium (HPS). With photoperiod plants, you’d use MH for veg and HPS for flowering.
MH bulbs emit a more bluish light optimal for the growing stage of cannabis. Once a plant goes into flowering, MH bulbs are switched out for HPS, which give off a more orange/reddish light spectrum ideal for promoting bud growth.
When you grow autoflowers with HID lights, the principle is generally the same as if you were to grow photoperiod cannabis. If you want the biggest yields and the fattest buds, you should still change from MH to HPS as soon as your plant naturally progresses into the flowering stage (usually after 3–4 weeks). It’s worth noting that, compared to LEDs, HIDs emit a lot of heat, and can quickly raise the temp in your grow room. They also have higher operational costs, but are more inexpensive outright.
![]() Pros
Pros
• Inexpensive to purchase
• Grows great-quality cannabis with great yields
![]() Cons
Cons
• Produces a lot of heat
• Needs two types of bulbs (MH and HPS) depending on the stage of your plant
• Bulbs need replacing every 6 months or so as they degrade
• Needs a reflector and a special power supply (ballast) to run
• Higher operational costs
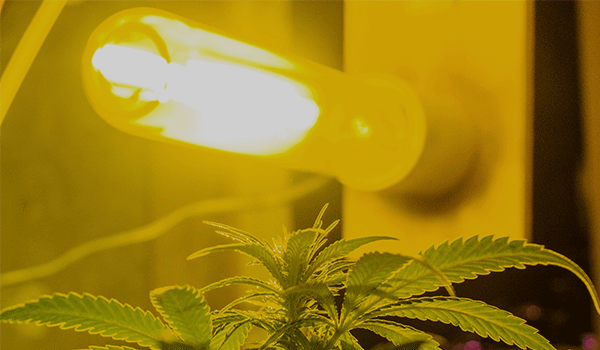
Another type of HID grow light is LEC, a more energy-efficient variant. Moreover, the light spectrum of these bulbs is more similar to that of natural sun rays, which some growers believe is beneficial for plant development.
LED GROW LIGHTS
In the past, when the technology was still new, LEDs were not taken very seriously among expert growers. When it became clear just how useful these lights were for growing cannabis, the next issue was that they were too expensive. These days, LEDs have become the go-to grow lights for many cannabis cultivators as prices have evened out and the technology has become standardised. Modern LED grow lights can now output as much light as good HID lamps, so you can achieve the same results as a classic HID setup. Although an LED system will likely cost you more than HIDs outright, the operational costs are significantly lower. In fact, there are several advantages to growing autos with LEDs: they use considerably less energy than HIDs, produce much less heat, and many LED grow lights are “plug-in and grow”, so you won’t need any extras like reflectors to operate them.
![]() Pros
Pros
• Easy to use
• Produce less heat
• Save energy/operational costs
![]() Cons
Cons
• More expensive outright
• Cheap, unreliable models flooding online market
When shopping for LED grow lights, you will often come across so-called “full spectrum” LEDs. These are lights suitable for all growing stages of cannabis, which means you can use them from the moment you plant your autoflower all the way to harvest.
Other LED lights have a switch you can flick to change the spectrum from “vegging” to “flowering”. Even if you’re growing autos, you should still switch it to flowering mode as soon as plants move into bloom.
PART 3: GROWING AUTOFLOWERING CANNABIS OUTDOORS
In this article, we have so far focussed on growing autoflowers indoors with a grow light. Given their often compact size, it’s not a surprise that autos are popular among indoor cultivators. Unlike some photoperiod strains, plants can easily squeeze into small tents, closets, etc.
But autoflowering cannabis isn’t just great for growing indoors. It also can be grown with great success outdoors.
Since autoflowers do not rely on the natural daylight hours to start flowering, this means you can plant them outdoors any time you want (weather depending). You can set them outside as soon as there is no risk of frost, and just like indoors, they will flower after a short 3–4 weeks of growth so you can harvest them in a super-short ~60–70 days. Because they grow and finish so quickly, this means you can achieve multiple outdoor harvest per year, or even per season! If you time your grow op right, you can harvest cannabis pretty much all year.
The other advantage of growing autoflowers outdoors is their discreet size and hardy nature. Stealth and guerrilla growers will be pleased with just how little maintenance these ladies require. Unlike a 3m sativa monster sticking out like a sore thumb, autos stay hidden among the undergrowth and are less likely to be discovered. Plus, the faster growth of autos can also reduce the chances of accidental discovery compared to a plant that requires many months to finish.
Even with efficient modern grow lamps, there is still nothing that beats sunlight when it comes to growing awesome weed. In addition to great yields, UV rays from the sun are also thought to benefit THC production, so you can enjoy some extra-potent cannabis from your outdoor autoflowers!
Happy growing!


